
Have you been hearing all about PFAS? Did you know that 11 states, including Minnesota, have moved to ban them by 2025? Some of you might know this, but before
Ruth’s Wild Rice Soup

by Ruth Wirt from Cookin’ with the Coyotes: Friends in Your Cupboards There are a lot of great versions of this quintessential Minnesotan soup, Ruth’s is the best. You can
2024 Small Business Satuday Event @ Clay Coyote in Hutch
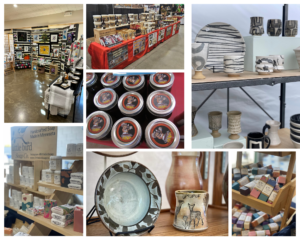
Come celebrate Small Business Saturday with us! The gallery will host a variety of local artists, craftspeople, and more. When: Saturday, November 30th from 10am-5pm Where: 22 First Ave NE,
October 2024 Reivews are In!

The October 2024 reviews are in!! People love our pots! ⭐⭐⭐⭐⭐ Absolutely beautiful, happy to add to my collection. – Enyo on Oct 19, 2024 ⭐⭐⭐⭐⭐ What an incredible piece!
September 2024 Reviews Are in!

The September 2024 reviews are in!! People love our pots! ⭐⭐⭐⭐⭐ My husband is a huge foodie and cooks every meal from scratch. I started collecting this cookware slowly moving